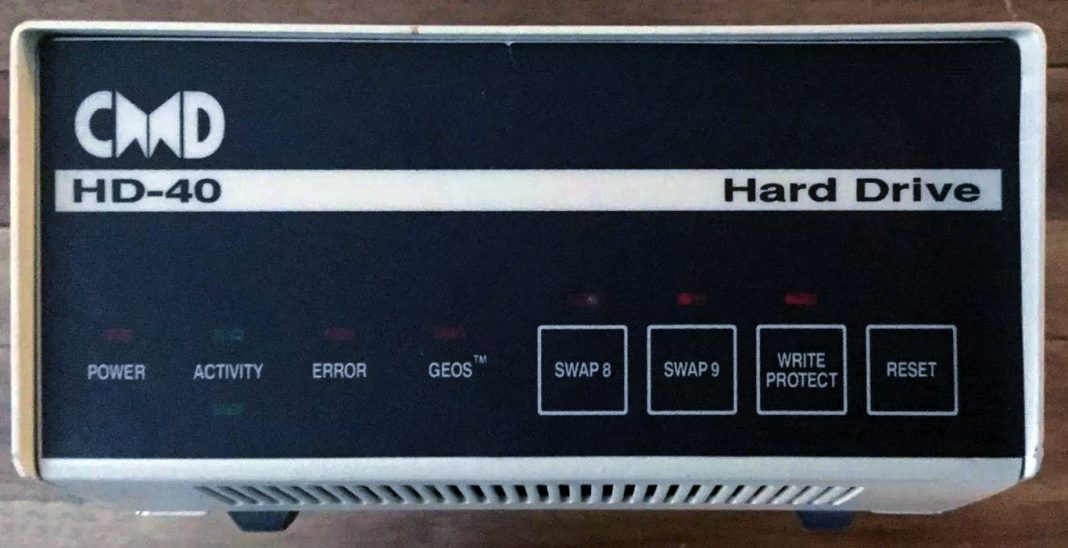
The CMD hard drive and COLOR 64 are a winning Combo! Your system will run smoothly and efficiently if you take the time to set your BBS up right the first time. Here is but one of the ways to get the CMD hard drive configured to run with your COLOR 64 BBS.
1. As you get your 20-200 Meg hard drive out of the box, you will notice that it is a rather small unit. It is a little larger than a 1581 drive, but in this case great things come in small packages. The CMD is a serial drive by default, so the only extra item you will need is a GOOD quality serial cable so you can add it to your 64/128 computer.
2. The CMD drive comes with a JIFFY DOS chip installed. You will find out that the CMD will work without installing a JIFFY DOS chip in your 64/128 but it will be dreadfully sloooow! The chip installation is a simple pop-out/pop-in on the 128 but with some 64’s the old DOS chips will need to be de-soldered and the new chip installed. You will notice that it still will not run as fast as a Lt. Kernal drive, but then each drive has its good and bad points.
3. Now that you have read through the docs (you have read them right?), you are ready to hook things up and turn on the drive! You will notice the CMD has already done a LL format (low-level format) on the drive. This can be done by you when need be, but CMD has their drive setup ready for any user. To simplify things, I have my default drive setup as CP1 and that’s where my drive goes as soon as I switch on the power, and even better that’s where I have located my programs files too.
As you can see from the documentation, the divisions or drives are called ‘CP’ units, with CP1 being first and CP2 being second, and so on. Your best bet is to have separate areas for each part of your BBS in different ‘CP’ units. For example, I have my system files in CP1 and password files in CP2, and system files in CP3. You can emulate either the 1541, 1571, or the 1581 drive but that really does limit your CP size and worse yet, how many entries you can have in your directories.
I am currently using the NATIVE MODE and would suggest that you do the same. That mode already holds a separate auto-boot sector in each unit and has unlimited directory entries! I currently have 220 directories on my system files drive! CMD also claims that you can also have a foreign mode on your hard drive at the same time (like an Amiga or an MS/DOS area). I have not tried that one yet. You can make a NATIVE partition anywhere from 255 blocks to about 16 Meg big! My PROGRAMS files drive is about 2 Megs and I try to keep my separate file area to about 3500 blocks or so. I run ‘Public Domain’ so if you need to increase the size of ANY partition, the MCOPY utility can move the whole partition at one time. Then just delete that partition and recreate it with as many blocks as you see fit. Once completed, copy that ‘moved’ partition back into the newly sized partition. I have a 2 Meg HOLDING CELL created just so I have an already created partition to move items into for short periods of time.
BTW, the CMD does NOT need any special mods to run with COLOR 64 (unlike the Lt. Kernal). I do, however, use the CMD v2.mod which pulls the time and date right off the hard drive so you don’t have to type it in each time you boot up your BBS! Greg (Pfountz) did create another mod, but that’s only if you want to use sub-directories but with this drive, I don’t feel there is a need for them.
========================================================
OK, now for the meat and potatoes of this article – How to get your COLOR 64 online with the CMD!
1. First, logically plan out how many different partitions you will actually need to get your BBS started.
2. Load ‘HD TOOLS’ and change your default drive to whatever drive you want your PROGRAM FILES on and make that the DEFAULT DRIVE.
3. While still in HD TOOLS, change your default drive number to 8.
4. While still in HD TOOLS, choose the CREATE PARTITION feature and create your main CP units. You can always create more partitions later but if you have 20+ CPs and want to delete CP1 then make some lunch and plan on a loooooooooooong wait! Even my PASSWORD FILES has its own CP because why should any file have to wait any longer than need be to be found, especially with the size of most password files anyway!
5. Once you have all of your overlays ready to go, you can use the FCOPY utility to copy them onto your default CP partition. When you load your (bbs) SETUP, it will have to be done in this SAME partition. Let me show you a list of what I have in mine to give you an idea…
- BBS
- SETUP
- BBS.SETUP 7.XX
- BBS.PARMS
- BBS.ML
- BBS.XMO
- BBS.PUNT
- BBS.INIT
- BBS.MSGS
- BBS.XFER
- BBS.OVL
- BBS.OV2
- BBS.OV3
- PRSCRN52000
- BBS.EMPIRE
- BBS.STOCK…etc
Here you get the main idea. Make sure that your SETUP is created in the same partition as your PROGRAM FILES.
6. With that all out of the way, hook up your modem and load SETUP. This part is pretty simple. If your password file is in CP2 and your system files are in CP3 then things will look like this…
Password File (8-15,0-1) 8 , 0 , cp2
System Files (8-15,0-1) 8 , 0 , cp3
Help Files (8-15,0-1) 8 , 0 , cp6 ……etc
The same goes for your transfer area. When asked what drive and area then put in drive 8 and whatever CP partition you want that specific area in.
That’s it! Have fun!
NOTE: We are not the original authors of this article and want to give full credit where credit is due. This article was originally written by Mike Troiano, the SYSOP of a Color64 BBS called THIRD STONE FROM THE SUN from back in time, at the height of BBSing via a modem. This snapshot of history was uncovered in some old archived SEQ files we recently recovered and wanted to share with the BBS community in 2022. So here it is with a few more to come. We hope you enjoy reading them.


