

Mingo’s Commodore Blog has just dropped a detailed, no-nonsense guide for anyone bold enough to build their very own Amiga 500 accelerator card. This DIY project is based on Mathesar’s 14MHz accelerator design, which is openly available on GitHub. And yes—it’s a real hardware project, not just a weekend tinker. You’ll need a steady hand, solid SMD soldering skills, and a basic understanding of electronics.
Before diving in, Mingo lays down some important warnings: make sure everything is powered off, wear that anti-static wrist strap, and triple-check your component alignment. This guide won’t hold your hand through mistakes—one wrong joint could toast your beloved Amiga.
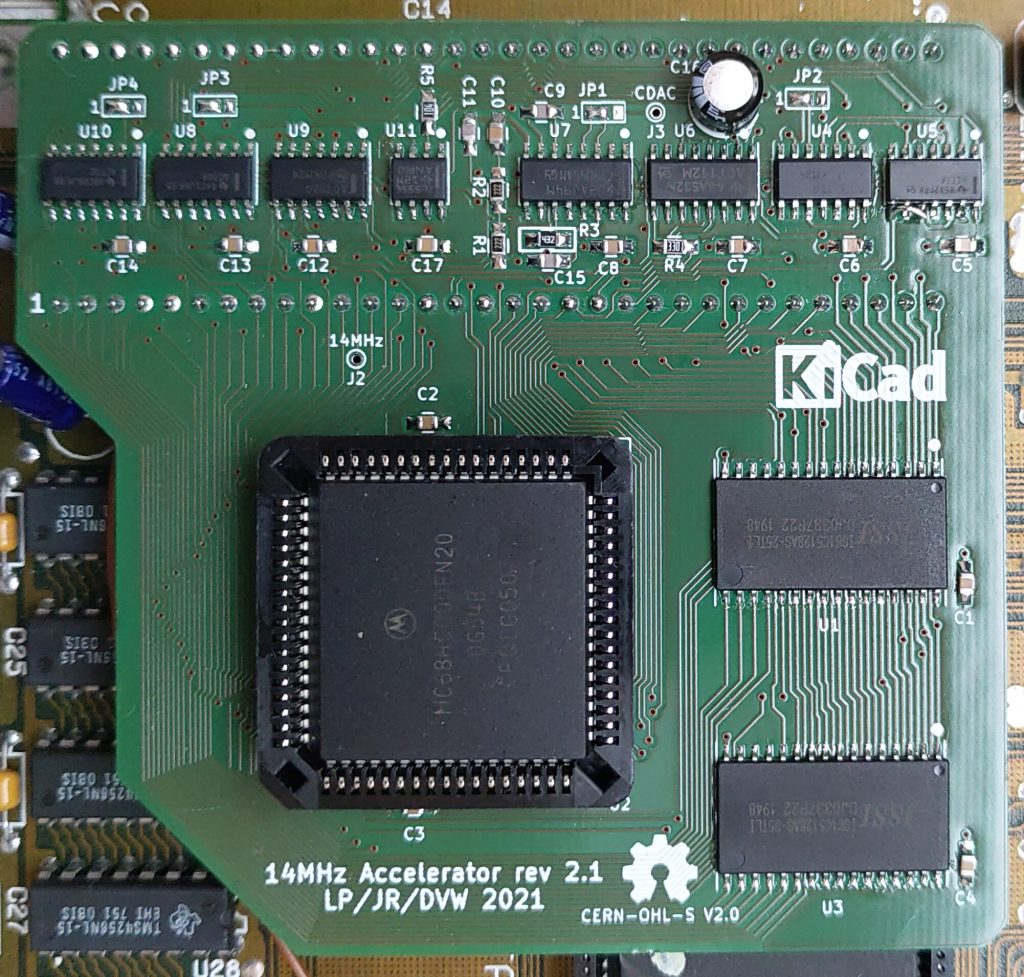
The build starts by downloading the Gerber files from Mathesar’s GitHub repository and uploading them to a PCB manufacturer like PCBWay. Once the bare board shows up in your mailbox, it’s time to gather the list of components—SRAM chips, 68000 CPU, logic ICs, capacitors, resistors, and some pin headers. The initial focus is on assembling and testing the processor section without memory expansion. That makes troubleshooting way less painful.
Once you’ve confirmed it boots correctly and passes basic tests using a tool like SysInfo, you move on to the full memory upgrade. After adjusting a few jumpers and soldering in the remaining components, the Amiga should finally be humming along at 14MHz with expanded RAM. There’s even a cool trick to toggle the memory expansion using a simple key combo.
And if you’re feeling extra precise? You can fine-tune the clock speed by tweaking resistor R3 and checking the output at test point J2 with an oscilloscope, though Mingo notes the default config worked fine for both cards they built.
See the full article on Mingo’s Commodore Blog!


